
Add Live Chat to Your Webflow Project
Deploy IMSupporting across your entire Webflow project with a single code block in Project Settings. Add to the Footer Code area once, publish the project, and the chat launcher appears on every page automatically.
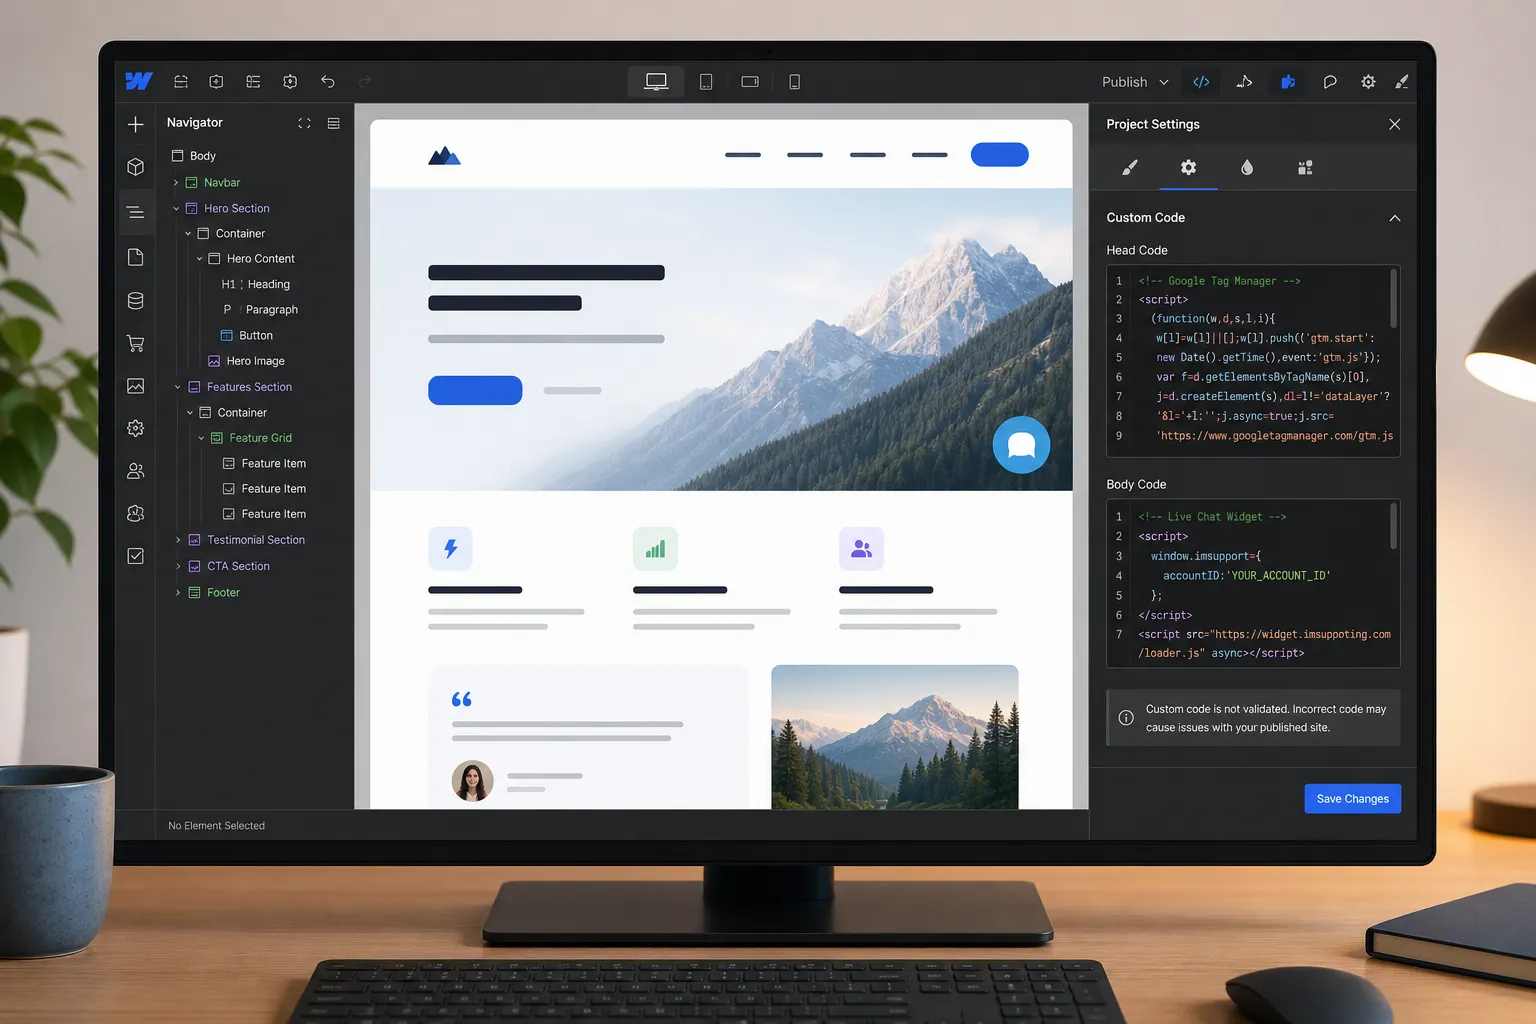
At a Glance — Webflow Install
Get Your IMSupporting Embed Code
Log in to your IMSupporting account and copy the widget snippet. Keep it ready before opening Webflow.
- Sign in at IMSupporting or create a free account.
- Navigate to your site settings and find the embed code or integrations section.
- Copy the full script tag — it contains your unique site identifier.
Open Webflow Project Settings
- Log in to your Webflow account and open the project you want to add chat to.
- Click the Settings icon (gear icon) in the left sidebar or access the project settings from the Webflow dashboard.
- Navigate to the Custom Code tab.
Add the Snippet to Footer Code
- Scroll down to the Footer Code section on the Custom Code page.
- Paste your IMSupporting snippet into the Footer Code text area.
- Click Save Changes.
</body> tag on every published page. This is the optimal location for a chat widget.
Publish the Project and Test
- Return to the Webflow designer and click Publish.
- Select your domain and publish to the live site.
- Open the live site in a private browser window.
- Confirm the IMSupporting chat launcher appears and test a message end-to-end.
Troubleshooting & FAQ
The chat widget is not showing on my Webflow site
Ensure the snippet is in the Footer Code section of Project Settings and the project was published after saving. Always test on the live published URL, not inside the Webflow designer.
Can I add IMSupporting to individual Webflow pages only?
Yes. In Webflow you can add a custom code embed to a single page's before-body-end section. However, for site-wide deployment the Project Settings Footer Code is the cleaner approach.
Does IMSupporting work on Webflow's webflow.io subdomain?
Yes. The widget loads on both webflow.io staging subdomains and custom domains. The published URL is required — not the designer preview.
Can IMSupporting help with my Webflow setup?
Yes. Use our free integration assistance page for help validating the placement on your specific Webflow project.
Ready to Go Live on Webflow?
After the launcher is live, configure AI chat, department routing, and workflow steps to turn every Webflow visit into a real conversation.